
Ingredients:
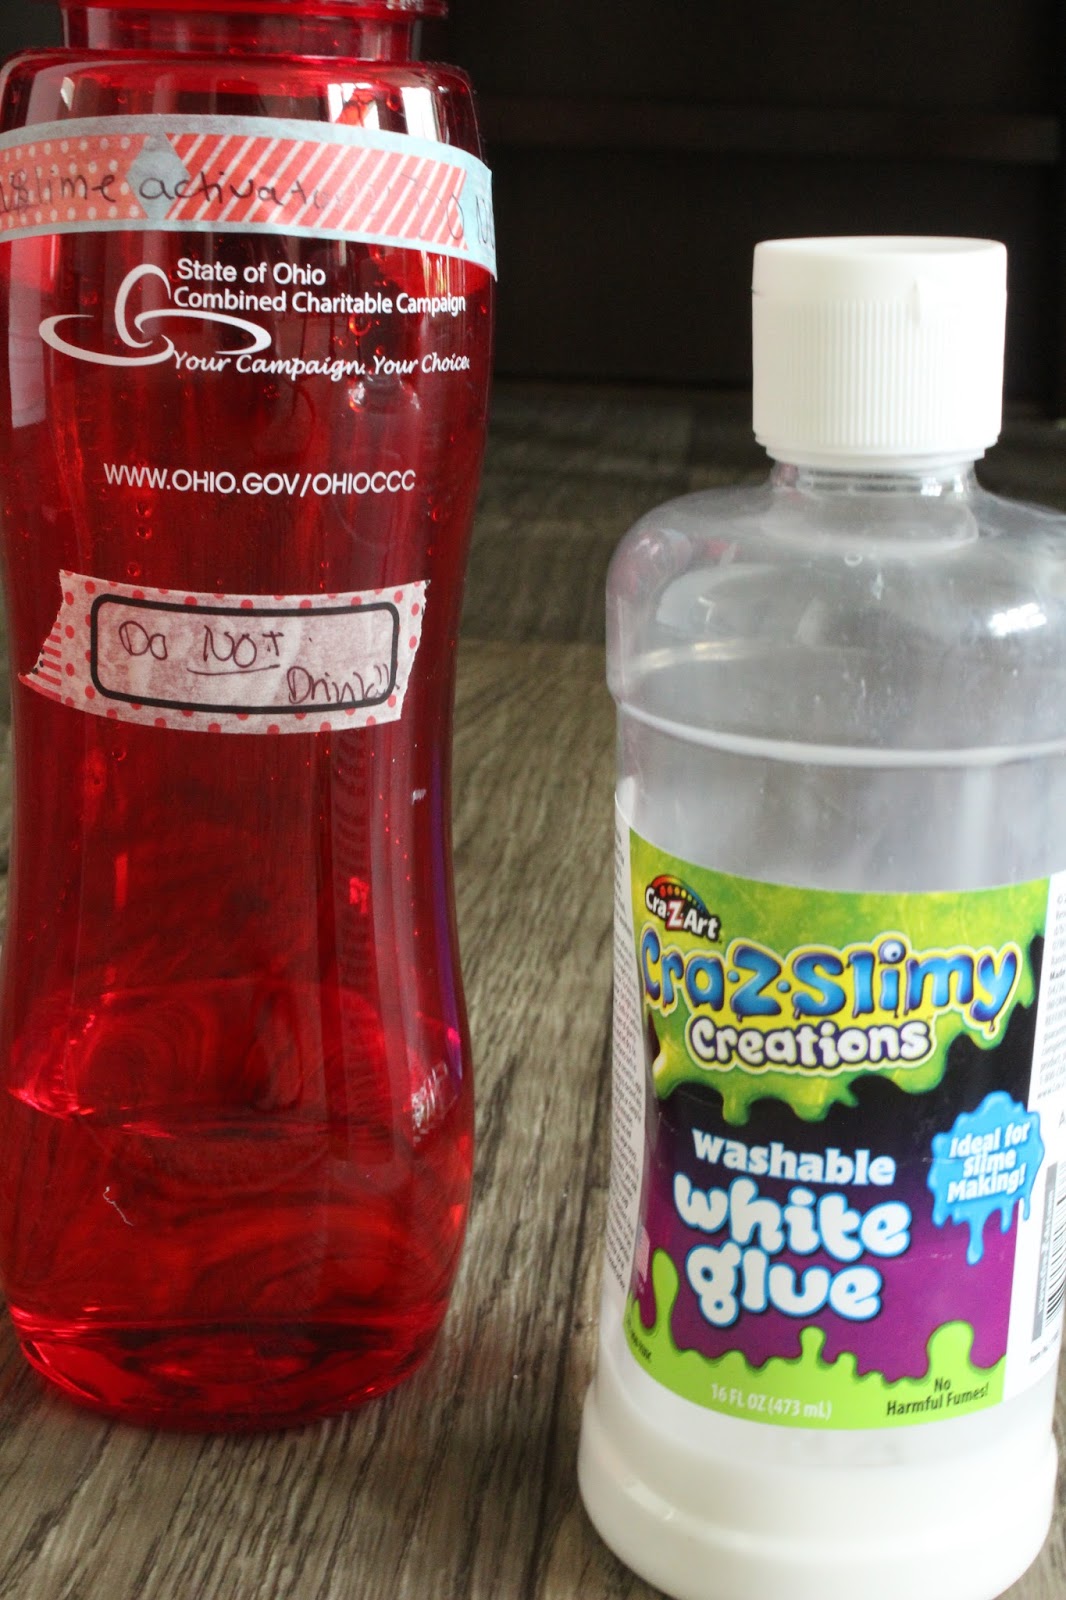
-Activator ingredients// The slime activator is basically what you use to turn goop into slime! I am using the common Borax diluted with warm water method (instructions in Step 1), but look around online for more different activators. (ex. liquid detergent, saline solution and baking soda, shampoo and freezer, etc.)
-Glue// You can use any glue, but make sure it has PVA (Polyvinyl Alcohol) in it. I like using the Cra-Z-Slimy Creations glue, because they have bigger bottles for cheap at 5 Below (the store), many people use Elmer's glue too. If you live in an area without those types, make sure to check the ingredients of a glue type before purchasing.

Optional; Decorations!// I will explain how to decorate/personalize your slime, but you can use baby oil, paint, glitter, shaving foam, etc.
Step 1: Setting activator (If you need to)
Activator is basically the perfect mixture to be you slime-binder. Some activators don't need to be pre-made (like liquid detergent) but if you are using the borax method, you need to mix it. Putting plain Borax in your slime could be dangerous!
WARNING: If you have pets or small siblings running around at home, make sure any borax-made slime doesn't get swallowed! If there is any risk of your slime being eaten, don't make slime with Borax. (Search: Kid safe slime)
To make my activator, I use 1/2 a cup of warm water with 1 tsp. of pure Borax. You can experiment with different amounts of Borax. The less borax, the more activator will be needed for each slime and vice versa. BE VERY CAREFUL! Don't burn yourself! Mix your Borax into the water. Keep mixing until the Borax completely dissolves. (It may take a while but I promise it will dissolve!) It should look like regular water once you are done mixing. Pour it into a glue or water bottle so you can use it again and again! (You will not need the whole mixture for one slime) Make sure you properly label it activator and clearly say that this mixture should NOT be eaten! Then, set your newly made activator aside!

The activator looks like water. BE CAUTIOUS!!!! It should not be consumed for any reason.
Step 2:Glue
Get a bowl to make the slime in, and pour in any amount of PVA glue. (I will link a helpful slime video down below if you are confused.) The more glue, the more slime!

Step 3:Extras!
Now, you could just add in the activator now, (see step 4 for instructions) and have a nice white cloud of white slime, but if you want to add something a little extra into your slime, here's how!
-Shaving foam// To make fluffy slime, add in shaving foam! I like adding enough to cover all of the glue, then thoroughly mixing it all together until it becomes one big fluffy cloud. :) The shaving cream makes the slime double the size, but uses less activator! I add in shaving foam into all of my slimes.


Sorry my hand covers it all. :(
-Corn Starch// I personally haven't tried this, but I have seen that adding in corn starch after adding shaving cream, it will create this really textured, fluffy, thick slime. It's perfect for swirling!
-Color!//You can totally bust out that pack of neon food coloring you used for your friend's birthday cupcakes... or if you are like me and don't have any friends....(Just kidding!) you can add some acrylic or tempera paint to color your slime! Just add in a drip or two, then mix. The less you use, the more pastel the colors will show. The more you use, the more deep the colors will be.

Walmart has pretty good 50 cent paints :)
-Beads/Rubber Bands// This is perfect for making crunchy/fish bowl slime. Plus, you could use old Rainbow Loom rubber bands. (I probably won't do this since I do occasionally loom) One time I did add in a few fuse/perler beads into the mix, because I have WAY to many. :P It makes a nice CRUNCH sound, which is super satisfying!
-Scents// If you have any food flavorings/scents/or perfumes lying around, add a little into your slime! You can do anything from candy corn scent to lavender!
-Glitter// for obvious reasons.... or to prove that you are a unicorn. :)
Anyways, you most likely get the point now. You can do ANYTHING with slime! Don't be afraid to experiment and customize! Who knows, maybe you'll make the next new viral slime recipe!
Step 4:Activate!
Okay, now that you have made the perfect slime concoction, now for the hardest part!
Turning it into slime.
First, give your slime a good mix. Make sure sure all of the ingredients are well mixed together.
Then, take your activator and mix a TINY bit of activator into your slime. I MEAN TINY! You can always add more. If you add to much, your slime will turn rubbery and won't stretch much.

Mix the slime goop violently so it takes in all of the activator. It should start sticking to each other, instead of the bowl. This will create a slime consistency.

If the slime seems to goopy or sticky, add more activator. If you accidentally added to much, go to step 6. It may help loosen up the slime.
Okay, once the slime has formed it's shape, do a poke test to see how sticky it is. If it is way to sticky, add activator. If it is only a bit sticky, or none at all, keep mixing or read on.
Now get in with your hands (you can use gloves if you want) and knead the slime with your hands. This helps the slime get rid of clumps, and mixes all ingredients better. Keep doing so until your slime seems neat and nice.
Step 5 (opt.): Baby oil
This step is optional but I HIGHLY recommend it. It only makes your slime better! This can also help firm, non-stretchy slime more workable. All you need is some baby oil.
Squirt a little baby oil onto the slime and knead it in. This should make the slime softer and stretchier.

After I added baby oil, my slime was soft, but it didn't stretch, and it ripped easily. So I added in some shaving foam and kneaded it in. This really helped, and made some AWESOME slime.
-------------------------------------------------------------------------------------------------------------------------
And that's it! I kept it simple today, because I felt like making just a big fluffy cloud. I added in some fine silver glitter and shaving foam, but that was basically it for the extras. Slime is pretty easy to make once you get the hang of it, so be patient! It took me a while to get the perfect slime. Anyways, have fun with your own recipes and slimes!
☮Peace,
Rebecca Rubin
Slime info video by "Cute Life Hacks": https://www.youtube.com/watch?v=EW-kCr6geDA


Disclaimer: In no ways am I affiliated/sponsored with any of the products or services I have mentioned in in this blog post. This is for entertainment purposes only.
If you made your way all the way down here comment, "Sally shapes super stretchy slime!" (I don't know!)
ReplyDeletewhy women not control on weight or no burn calories?
Calories Burned in a Day
nice.....................
ReplyDeletehttps://bit.ly/2D4c51L